Utilizing SwiftyMocky for Swift Unit Testing
In the world of software development, writing unit tests is essential for ensuring the reliability and maintainability of code. However, creating effective unit tests can sometimes be challenging, especially when dealing with dependencies such as network requests, databases, or external services. This is where mocking frameworks come into play.
SwiftyMocky is a powerful mocking framework for Swift that simplifies the process of mocking objects and functions during unit testing. In this article, we will explore how to use SwiftyMocky to streamline your unit testing workflow and write more robust tests.
Getting Started with SwiftyMocky
To install SwiftyMocky using Fastlane, you can create a custom lane in your Fastfile. But before we should install Fastlane using gems. You need just update your GemFile like this
gem 'fastlane', '~> 2.212.1'ℹ️ if you didn’t have yet a GemFile you need only install a correct version of ruby for example 3.3.0.
bundle installThen, run this command if needed to install SwiftyMocky-CLI:
bundle exec fastlane installSwiftyMockyFastlane will generate this lanes on your fastFile file.
ensure_bundle_exec
default_platform(:ios)

###############################
## Life Cycle hooker
###############################

error do |lane, exception, options|
 # _notification_error(lane, exception, options)
end

###############################
## Public Lanes
###############################

lane :installSwiftyMocky do
  sh("bundle exec brew install mint")
  sh("bundle exec mint install MakeAWishFoundation/SwiftyMocky")
end

lane :uninstallSwiftyMocky do
  sh("bundle exec mint uninstall MakeAWishFoundation/SwiftyMocky")
  sh("bundle exec brew uninstall mint")
end

lane :generateMocks do
  sh("bundle exec mint run MakeAWishFoundation/SwiftyMocky generate")
end
We will use later this lane :generateMocks to generate our mocks. But before that we need now to configure how swiftymocky will generate our mocks.
SwiftyMocky falls into second category (originally proposed by Przemysław Wośko). Whole concept is based on Sourcery(written by Krzysztof Zabłocki) and utilizes meta-programming concept.
We need to create our Mockfile with this content for example
sourceryCommand: mint run krzysztofzablocki/Sourcery@2.1.3 sourcery
sourceryTemplate: null
SwiftyMockyProject:
sources:
include:
- ./SwiftyMockyProject
output:
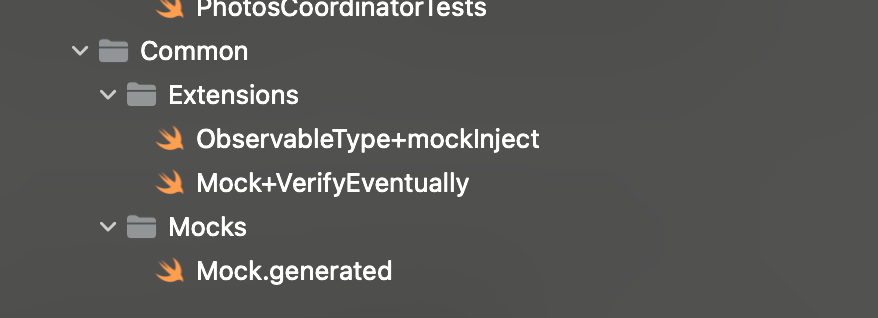
./SwiftyMockyProjectTests/Common/Mocks/Mock.generated.swift
targets:
- SwiftyMockyProjectTests
testable:
- SwiftyMockyProject
import:
- Foundation
- RxCocoa
- RxSwift
- UIKitThe provided configuration appears to be related to Sourcery and SwiftyMocky within a project setup. Let’s break down the configuration:
- Sourcery Command: It specifies the command to run Sourcery.
mint run krzysztofzablocki/Sourcery@2.1.3 sourcerysuggests the usage of Mint to run Sourcery version 2.1.3. - Sourcery Template: This field is set to
null, indicating that no specific template is specified. Sourcery usually generates code based on templates. - SwiftyMockyProject:
- Sources: It includes the directory
./SwiftyMockyProjectfor sourcing files. - Output: Generated mock files will be placed at
./SwiftyMockyProjectTests/Common/Mocks/Mock.generated.swift. - Targets: The tests target
SwiftyMockyProjectTestsis specified. - Testable: The main project
SwiftyMockyProjectis marked as testable, indicating that it’s accessible for testing. - Import: Libraries and frameworks needed for generating mock files are specified, including
Foundation,RxCocoa,RxSwift, andUIKit.
- Sources: It includes the directory
But you should have mint installed on your machine using this command
bundle exec brew install mintℹ️ We are using Mint to run Sourcery at a specific version (2.1.3) due to limitations or version differences between the default version of Sourcery provided by Fastlane (1.8) and the one required by your project.
Using Mint to execute a specific version of Sourcery is a common workaround to bypass version differences and ensure the tool is compatible with the specific needs of your project.
Inside our code
To generate mocks, we need make some staff on our code specially using protocol and annotate with a sourcery annotation like this for example:
import Foundation
import RxSwift

//sourcery: AutoMockable
protocol PhotosRepository {

    func fetchPhotos() -> Observable<[Photo]>

}

import Foundation
import RxSwift
import UIKit

//sourcery: AutoMockable
protocol ImageDownloader {

    func image(for urlString: String) -> Observable<UIImage?>
}
Now we need only to run our fastlane lane using this command
bundle exec fastlane generateMocksSourcery will generate automatically a new file which is the Mock.generated.swift and place it in this path ./SwiftyMockyProjectTests/Common/Mocks/Mock.generated.swift
Now write our tests!
import RxSwift

@testable import SwiftyMockyProject

final class PhotosViewModelTests: XCTestCase {
private var sut: PhotosViewModel!

    private let imageDownloader = ImageDownloaderMock()

    private lazy var photoRepository: PhotosRepositoryMock = {
        let photoRepository = PhotosRepositoryMock()

        photoRepository.given(.fetchPhotos(willReturn: Observable<[Photo]>.mockInject()))

        return photoRepository
    }()
}
We used our imageDownloader and also our repository as dependencies in our photosViewModel which is our system under test (SUT). To make tests on our view model, we need to inject dependencies as mocks.
We check the invocation of our method fetchPhotos using the photoRepositoryMock object by given a fake observable value. We created an extension static method on Observable type to do this. We called it mockInject().
import Foundation
import RxCocoa
import RxSwift

private var xoSubjectAssociationKey: UInt8 = 0
private var xoSpyAssociationKey: UInt8 = 1

extension ObservableType {

    static func mockInject() -> Observable<Element> {
        let subject = PublishSubject<Element>()
        let observable = subject.asObservable()
        observable.storeSubject(newValue: subject)
        return observable
    }

    func storeSubject(newValue: PublishSubject<Element>) {
        objc_setAssociatedObject(
            self,
            &xoSubjectAssociationKey,
            newValue,
            objc_AssociationPolicy.OBJC_ASSOCIATION_RETAIN
        )
    }
}
You can easily make stubbing also by giving non observable value like this for example
// Arrange

        let basketDTOMock = BasketDTOProtocolMock()

        basketDTOMock.given(.id(getter: Constants.basketId))

        basketServiceManagerMock.given(.checkProductsInventory(willReturn: .just(basketDTOMock)))
Summary
SwiftyMocky serves as a powerful mocking framework for Swift, streamlining the process of creating mock objects for unit testing. With SwiftyMocky:
- Efficient Mock Creation: SwiftyMocky simplifies the creation of mock objects, allowing developers to quickly generate mocks for dependencies such as network requests, databases, or external services.
- Fluent API: It provides a fluent API for defining mock behaviors and expectations, making it easy to set up and verify interactions with mocked objects.
- Enhanced Testing Workflow: By integrating SwiftyMocky into your testing workflow, you can write more robust tests with less effort, improving the reliability and maintainability of your codebase.
- Swift Package Manager Integration: SwiftyMocky seamlessly integrates with Swift Package Manager, enabling easy integration into Swift projects.
- Support for Fastlane Integration: SwiftyMocky’s flexibility allows for integration with tools like Fastlane, enabling efficient automation of the mocking process within your project setup.
References
https://blog.girappe.com/?swiftymocky/